
利用 github action 實現 hexo CI/CD 自動部署
前言
過去使用 travis 完成 hexo 網站的自動化部屬, 然而 Travis 免費版有使用次數上的限制, 加上公司使用 github action 實現 CI/CD, 因此心生一念不如就嘗試把 CI/CD 搬到 github action 完成吧!!
Github Action
首先來了解一下 github action, 以下為 GitHub Doc 中的定義, 簡而言之就是可以自定義一個 workflows 監聽 push,pull request event, 並且自動完成一連串的測試以及部署動作。Github Official Doc 連結
GitHub Actions is a continuous integration and continuous delivery (CI/CD) platform that allows you to automate your build, test, and deployment pipeline. You can create workflows that build and test every pull request to your repository, or deploy merged pull requests to production.
CI/CD 架構
Solution 1: Two Repository
搜索了一下網路上的文章有許多都是將 source repo 跟 renderer repo (page) 分開建立兩個 repo, 並且各司其職。
source repo: 存放 source code & 文章, 不直接 serve page.
page repo: 存放 github page source generated 的靜態檔案, 並且由此 repo serve page.
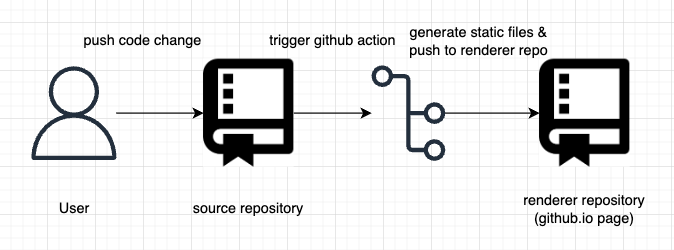
流程如下
- developer/ author implement some code chagne.
- push change to source repository.
- source repo trigger github action.
- github action generate static file.
- github action push generated static file to renderer repo(page).
如果想採用上述做法可以參照此篇網路教學
然而我自己不是很想將 repo 分成兩塊, 於是取而代之使用下面的方案實作 XD
Solution 2: One Repository (以本篇的實作架構)
相較於使用不同 repotories 區分 source code 以及 generated files, 應該可以用不同 branch 達到一樣的效果, 以下為流程。
main/master branch: source code
deployment branch: generated files & static files
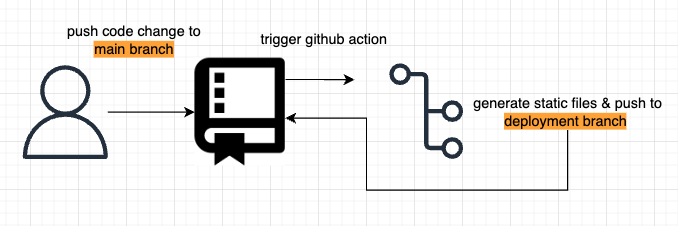
流程如下
- developer/ author implement some code chagne.
- push change to source repository.
- sourece repo trigger github action.
- github action generate static file.
- github action push generated static files to deployment branch.
實作細節
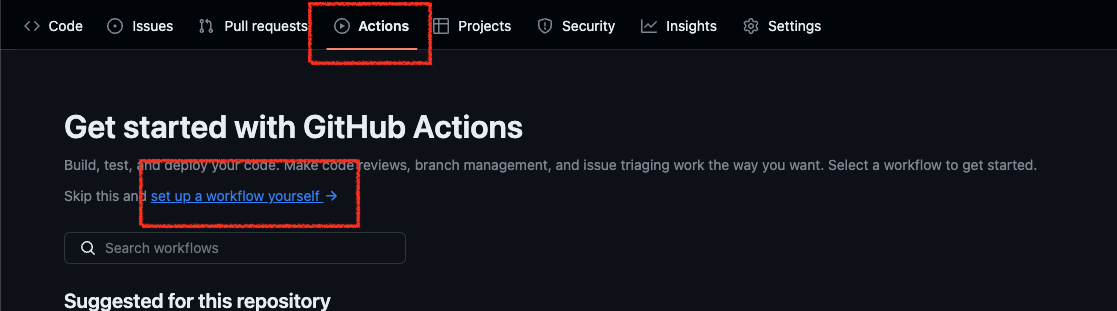
- 進入到 project 頁面, 切換到 Action Tab, 點擊 set up a workflow yourself
將此段 yaml 檔案貼上, 將最後一行的 master 換成你存放 source code 的 branch, 並將 gh-pages-2 替換為要 serve page (github page io) 的 branch.
1
2
3
4
5
6
7
8
9
10
11
12
13
14
15
16
17
18
19
20
21
22
23
24
25
26
27
28
29
30
31
32
33
34
35
36
37
38
39
40
41
42
43
44
45
46
47
48
49
50
51
52
53
54
55
56
57
name: Deploy
on:
push:
branches:
- master
release:
types:
- published
jobs:
deploy:
runs-on: ubuntu-latest
steps:
- name: Checkout Branch
uses: actions/checkout@v2
with:
ref: master
- name: Install Node
uses: actions/setup-node@v1
with:
node-version: "18.x"
- name: Install Hexo
run: |
export TZ='Asia/Taipei'
npm install hexo-cli -g
- name: Install Hexo
uses: actions/cache@v1
id: cache
with:
path: node_modules
key: ${{runner.OS}}-${{hashFiles('**/package-lock.json')}}
- name: Install Packages
if: steps.cache.outputs.cache-hit != 'true'
run: |
npm install --save
- name: Hexo Static Files Generation
run: |
hexo clean
hexo generate
- name: Deploy
run: |
cd ./public
git init
git config --global user.name '${{ secrets.GITHUBUSERNAME }}'
git config --global user.email '${{ secrets.GITHUBEMAIL }}'
git add .
git commit -m "${{ github.event.head_commit.message }} $(date +"%Z %Y-%m-%d %A %H:%M:%S") Updated By Github Actions"
git push --force --quiet "https://${{ secrets.GITHUBUSERNAME }}:${{ secrets.GITHUBTOKEN }}@github.com/${{ secrets.GITHUBUSERNAME }}/${{ secrets.GITHUBUSERNAME }}.github.io.git" master:gh-pages-2
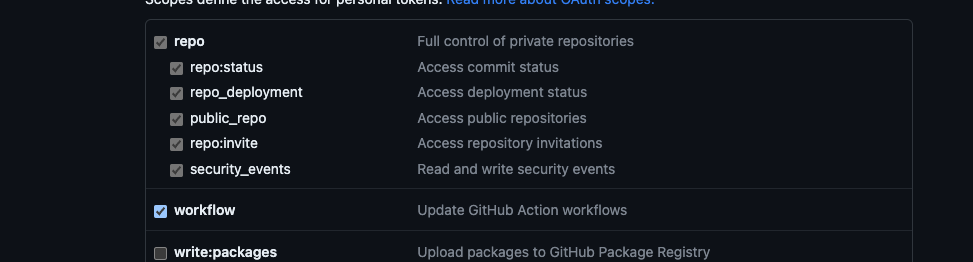
產生 GITHUB TOKEN, 權限不需全給, 只需要給
repo&workflow.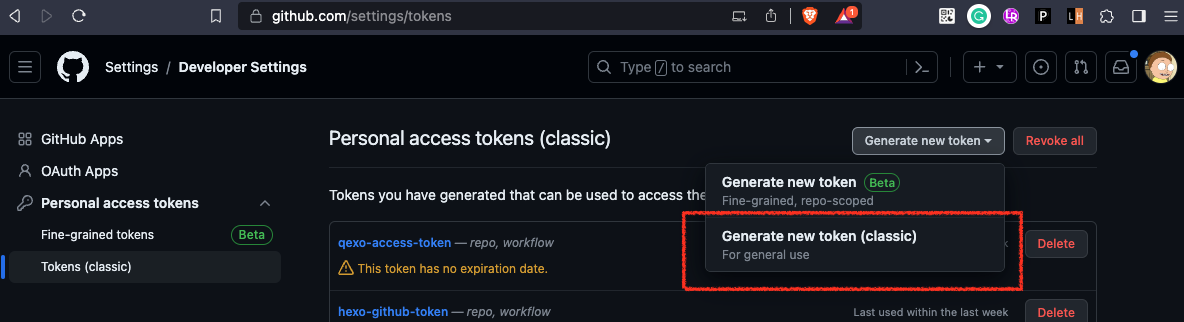
設定 Github Action Variable, Github token 為步驟三產生的
token
設定 Serve Pages
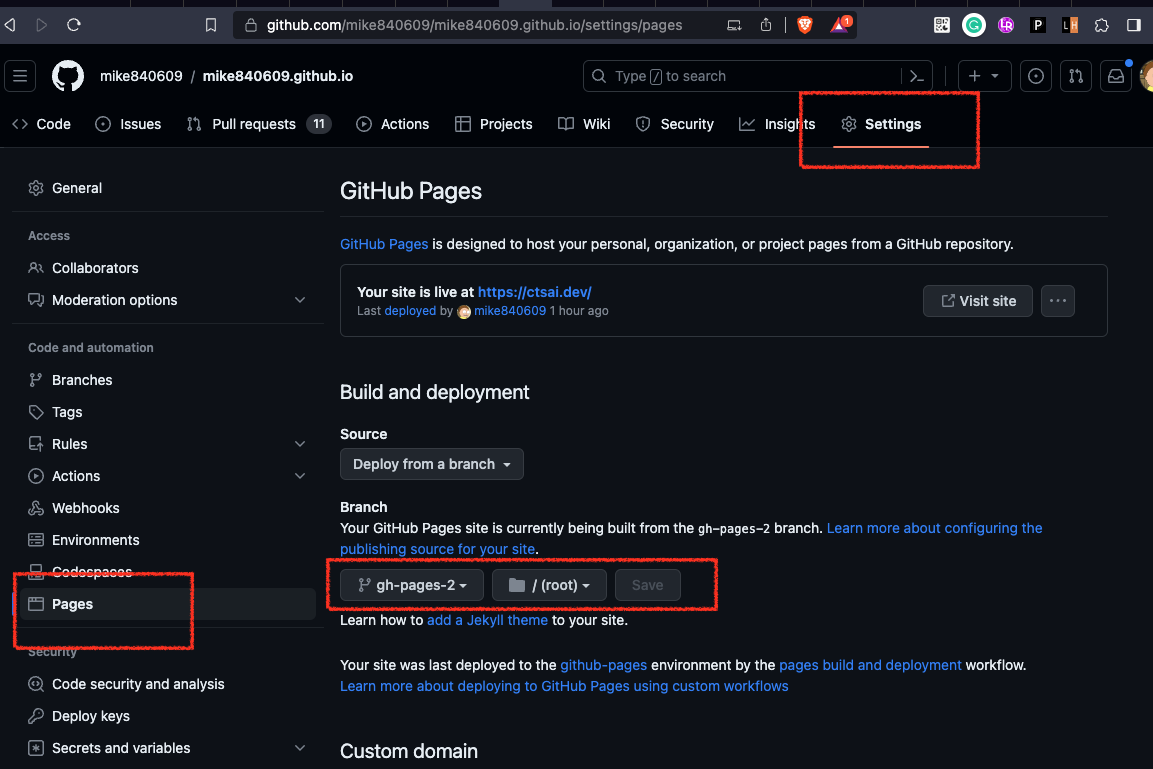
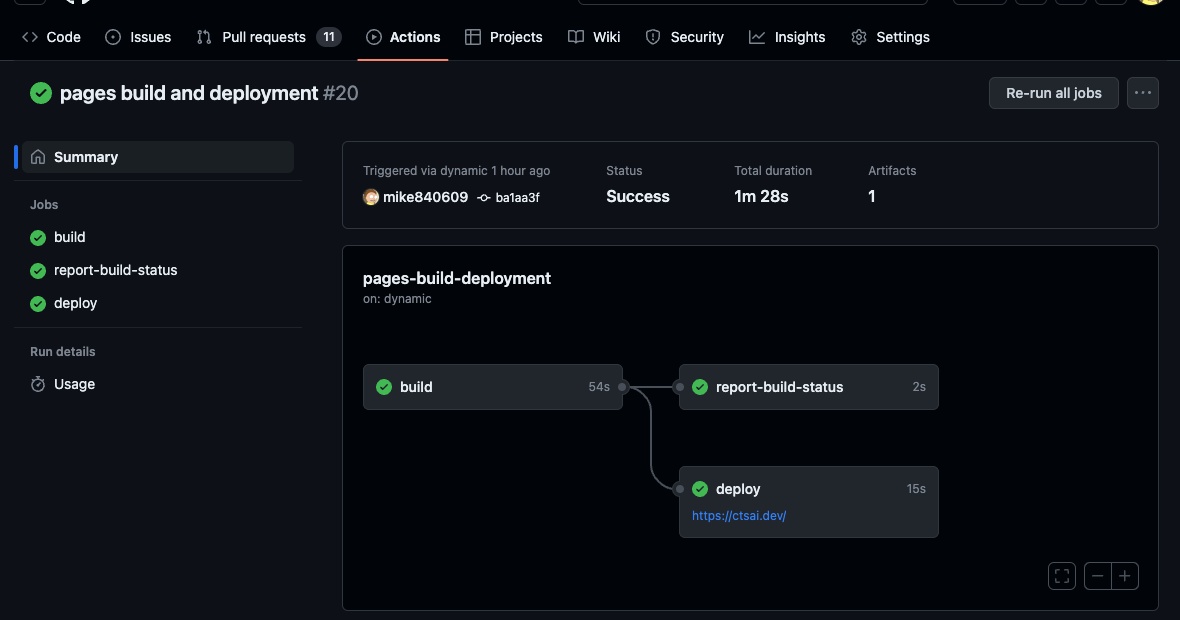
以上這樣就完成了, 接著每次 master branch 被更新就會自動 trigger github action, 並且將變動的內容生成的靜態檔案自動 push 到 deployment branch
Resource
利用 github action 實現 hexo CI/CD 自動部署
https://ctsai.dev/20230909/hexo-github-action-auto-deployment/